Generate a downloadable CSV file of Dynamics data in a #PowerApps Portal site
Tweet
Last week I had a requirement for a customer where a portal user should be presented with a link to download a CSV file created with data from the current Dynamics 365 instance.
While we originally considered using Excel Templates within D365 (generating the spreadsheet, adding it to an Annotation record, then exposing that to the portal), or a Power Automate flow, etc., we eventually decided on a more elegant solution that can generate dynamic CSV files from within the portal itself in real time.
The tl;dr design is:
- Create a new Web Template generating an OData feed exposing the required data
- Configure Table Permissions and Web Roles for the data required as appropriate
- Create a new Web Template which consumes the OData feed and creates an HTML anchor with encoded CSV content
1. Create a new OData feed
There’s plenty of blog posts and documentation out there in the world on the subject of creating feeds in a Portal with Lists (formerly Entity Lists), e.g.
- About lists – Power Apps | Microsoft Docs
- Retrieve Dynamics 365 CRM data in Portal by calling Odata using JavaScript | Microsoft Dynamics 365 CRM Tips and Tricks (inogic.com)
- Dynamics Portals – Entity List – Integration using OData feed | Rajeev Pentyala – Microsoft power platform blog
Or you can generate your own with Liquid and FetchXML for more granular control over the feed, e.g.
| {% fetchxml fetch_query %} | |
| <fetch version="1.0" output-format="xml-platform" mapping="logical" distinct="false"> | |
| <entity name="adx_webpage"> | |
| <attribute name="adx_webpageid" /> | |
| <attribute name="adx_name" /> | |
| <attribute name="createdon" /> | |
| <order attribute="adx_name" descending="false" /> | |
| <filter type="and"> | |
| <condition attribute="adx_name" operator="not-null" /> | |
| <condition attribute="adx_isroot" operator="eq" value="1" /> | |
| <condition attribute="adx_websiteid" operator="eq" value="{{ request.params('website-id') }}" /> | |
| </filter> | |
| </entity> | |
| </fetch> | |
| {% endfetchxml %} | |
| {% assign results = fetch_query.results %} | |
| [ | |
| ["Webpage ID", "Webpage Name", "Date Created"], | |
| {% for entity in results.entities %} | |
| {% if forloop.last %} | |
| ["{{ entity.adx_webpageid }}","{{ entity.adx_name }}","{{ entity.createdon | date: 'u' }}"] | |
| {% else %} | |
| ["{{ entity.adx_webpageid }}","{{ entity.adx_name }}","{{ entity.createdon | date: 'u' }}"], | |
| {% endif %} | |
| {% endfor %} | |
| ] |
2. Configure Table Permissions
This is pretty standard stuff: ensure that whatever data you’re exposing in the feed is secured with the appropriate Table Permissions, related to the appropriate Web Role and assigned to the appropriate consuming users.
(If, for some reason it should be public, it could be related to the Anonymous User, though be careful with this for obvious reasons!)
3. Create a new Web Template to generate the CSV
The below sample Web Template fetches the Json array from the above feed and converts it into a comma delimited format, prefixes it with the appropriate mime type for a CSV, encodes it and then generates an HTML anchor to present it to the user.
| [...] | |
| <div id="csv_data"></div> | |
| <script type="text/javascript"> | |
| // '/odata-web-pages' is where I published the sample FetchXml-generated feed | |
| fetch("/odata-web-pages?website-id={{ request.params['website-id'] }}") | |
| .then(response => response.json()) | |
| .then((data) => { | |
| const link = document.createElement("a"); | |
| const linkText = "Download Csv file"; | |
| let csvContent = "data:text/csv;charset=utf-8," + encodeURIComponent(data.map(e => e.join(",")).join("\n")) | |
| link.append(linkText); | |
| link.setAttribute("href", csvContent); | |
| link.setAttribute("download", "your_csv_data_file.csv"); | |
| link.setAttribute("title", "WebPage CSV Download"); | |
| $("#csv_data").append(link); | |
| }) | |
| .catch((error) => { | |
| console.error('Do something with this error:', error); | |
| }); | |
| </script> | |
| [...] |
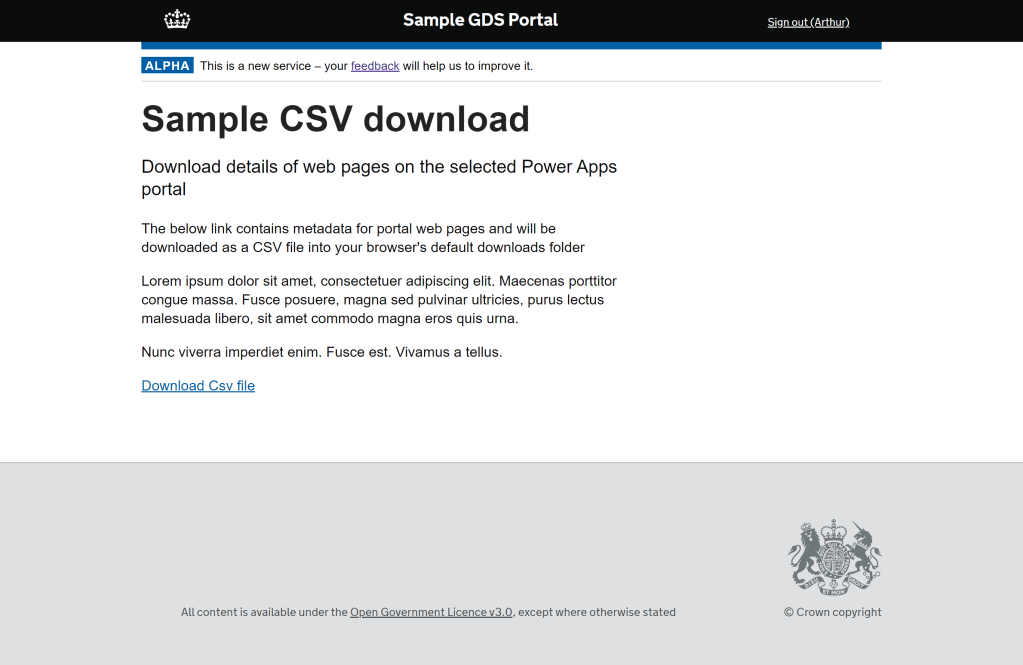
Included in my sandbox portal, the result looks something like this:
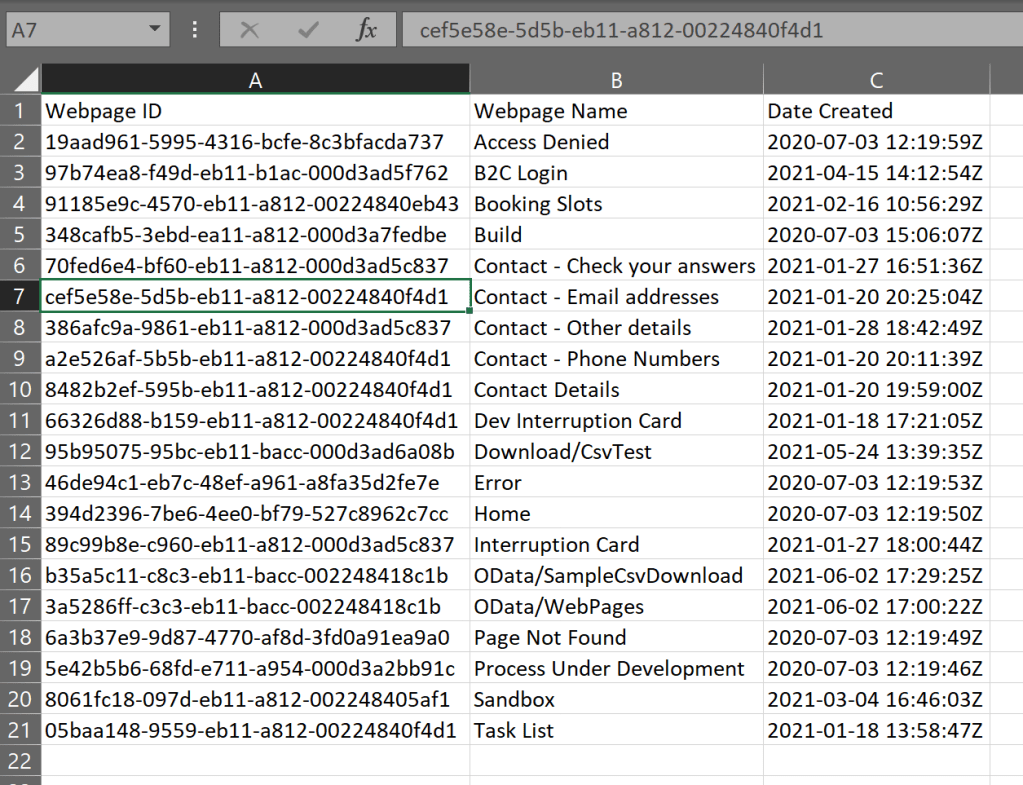
And the resulting download something like this:
To production-ise this code snippet, it should be in it’s own template, with input parameters and then included in other consuming templates
Such as:
{% include 'DownloadCsv' feedUrl: 'odata-web-pages' filename: 'your_csv_data_file.csv' %}
Final considerations…
- For extracts of larger than 5,000 records, you could use the paging cookies functionality in the Liquid FetchXml tag.
- I haven’t tested it with very large datasets (In this scenario, I only needed a relatively small dataset on a regular basis) so be sure to do some performance testing if you’re working with 1,000s of records to see how it scales.
- Remember that the conversion to the CSV format is just a foreach loop so for larger datasets, you may want to expose it in that format directly in the feed (as opposed to Json which was done here to enable programmatic and manual use).
- The CSV file is generated on page load. While this is good for up to date/dynamic/real-time exports, it can take a second or two to run and the larger the dataset, the longer it will take, so think about the UX and maybe include a placeholder while it’s generating (think spinning wheel or inactive link with appropriate “please wait” content snippet).
- Given that this is all done within the portal, you have control over writing something back during download too (e.g. last download datetime, last record id downloaded) to help filter future downloads or to audit downloads by user, etc.
- In this scenario, we didn’t want to save the output files in CRM (or anywhere else!) but of course it is possible if requirements demand it

Hi Arthur,
Great post. I have a question tho, how or where do you get the website-id when you request it from the parameters, as if I try and copy your code for the HTML anchor, it does not work as the website-id is blank?
Thanks again
LikeLike
Hi Aakaash, thanks!
The `{{ request.params(‘website-id’) }}` liquid snippet in the fetch query is telling the template to expect a query parameter to be included in the rendering page’s URL.
For example, in `https://your-site-name..powerappsportals.com/custom-download-page?website-id=af5dc61d-0ffc-eb11-94ee-0022481b4028` it would extract the provided GUID.
The use case being that the user would navigate to this page from another page (e.g. a list of sites, click on one and the portal appends it to the query params in navigation, or using the ‘Append Record ID To Query String’ attribute on a Basic Form).
LikeLike
Hi Arthur,
Thanks for the reply, the reason I ask is because I cannot get the second web template snippet to work in my code.
Is there something else I am missing as I followed the post, I created the first web template with the fetchxml to retrieve the data.
Then the second web template linked to a web page that has the code that gets to create an HTML anchor but it does not seem to work on my side, I get an “unexpected token ‘>’ “ error?
Please assist, as this is exactly what I need on my portal. 🙂
LikeLike
When you say “the second web template linked to a web page” – is your first web template linked to a web page too? It should be if it isn’t – The idea is that the first web template is a stand alone page that returns the results (like building your own API), that you can navigate to directly (in the example in the post it is ‘/odata-web-pages’) so you should be to navigate to that page and see the results as a first step in debugging.
The second web template (and page) then calls the first one and processes/formats the results into a CSV. (Of course you could combine the two into a single web template if it’s a one of use case)
There’s also no error handling in the sample template, so a production site would of course need things like checking if there are zero returned results etc. You might also need to check that the user you’re logged in with has entity permissions to read the target entity.
(And finally, a small thing, but the “unexpected token ‘>'” error is most often caused by a typo so double check you don’t have any extraneous characters or escape characters lying around! 🙂 )
Good luck!
LikeLike